


Fast Trak is a unique prefabricated vertical track and horizontal bracket suspension system offering flexibility and faster installation times – so, how easy is it to install Fast Trak?
The system itself is straightforward to install and brings a huge amount of added benefits to projects when compared with the traditional threaded rod system, as there’s no cutting, no mess and no stress involved!
Here’s a short step by step installation guide to installing Fast Trak for electrical cable containment, which shows how the suspension system is six times faster than traditional installation methods!
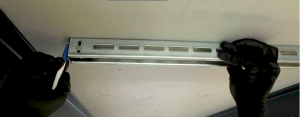
Step 1 – Position the tracks
Fast Trak has been designed with a unique positioning system. Indicators at each end of the bracket allows for perfect positioning every time by marking fix points in the indent found at the end of each bracket.
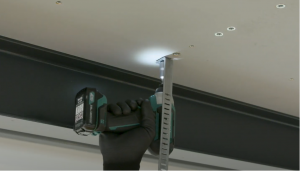
Step 2 – Secure the tracks
Holes should be drilled where the fixing points are marked. The tracks can then be secured to the ceiling through the 10mm hole on the fixing tabs. Concrete screws or anchor bolts should be used, and the fixing tabs should be outward facing on every occasion. Ensure the tracks run parallel to the products requiring containment.
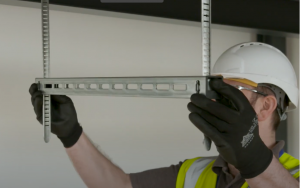
Step 3 – Install the bracket
The latches on each side of the bracket should be pushed which will allow the tracks to be inserted into the bracket. The bracket can be positioned at its required height sliding it to the correct location. Releasing the latches will ensure the bracket engages and locks into the tracks. This should be double checked by applying light pressure on the top of the bracket. Should adjustments be required, just push the latches in again at both sides and reposition by sliding up and down the track to the new position.
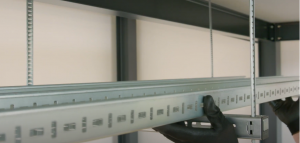
Step 4 – Adding the cable basket
Simply insert the cable basket clips into the slots on the bracket and turn clockwise until it will turn no further. Put the next clip in line with the wire basket so that it can be attached. Position the cable basket and push into the bracket; it will click into position.
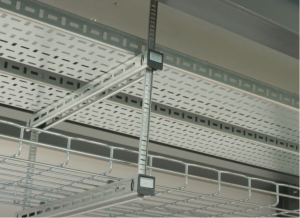
Step 5: Adding the cable tray
Once the cable tray has been placed in the correct position on top of the bracket and the vertical slot of the tray is lined up with the horizontal slots in the bracket, the arms of the cable tray clip can be inserted through the vertical slot. The cable tray clip pin secures the tray to the bracket using a simple push-fit motion.
Fast Trak supports safe and speedy installations and is suitable for applications in construction and renovation projects such as high-rise residential, data centres, industrial, retail, office space, healthcare settings, and educational facilities.
To find out more visit https://www.gripple.com/products/building-services/fast-trak-range/